My Rust Journey - 17 Jan 2024
This is the first post about my journey learning the Rust programming language using the Rust Book. I am documenting this as I think it is a useful thing to do for people interested in learning Rust from my non-developer perspective.
At this stage, you already installed Rust on your machine and you are ready to write and run your first Rust program.
I am using VS code with the rust-analyzer extension. I am working on an M1-mac.
The following tutorial will cover Chapter 1 of the Rust Book. It is meant to be a short summary and to be used with the book as a complementary source of information.
Getting Started
I created a rust-book-projects folder and I work inside that folder from now on. We create the hello_world folder and navigate within that folder.
mkdir hello_world
cd hello_world
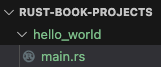
Within the hello_world folder, we add a file, and save it with the name main.rs (a Rust file), and we create the main function in it as follows:
fn main() {
    println!("Hello, world!");
}
At this stage, the folder hello_world just contains the main.rs file.
You can run the program using the Rust compiler
rustc main.rs
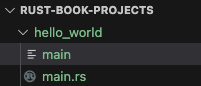
At this stage, the folder hello_world contains the main.rs file and the main executable.
You can run the executable with ./main, which will print “Hello, world!” as specified in the program. The nice thing about the executable file is that it can run on other machines without installing Rust. Also, note that compiling and running a program are two separate stages: we compiled the main.rs file to generate the main executable, and we then ran it.
But let’s take a look at the main.rs file.
fn main() {
    println!("Hello, world!");
}
We created a function called main using fn. Such a function is the one that will always run first in any Rust program. Empty parenthesis () means that the current function does not have parameters. In fact, it just prints the string “Hello, world!” using the println! macro. We will see macros later on. A function is always wrapped in {}. The ; at the end of the line means that we just finished writing an expression. More about this later.
Using Cargo
Cargo is a Rust build system and package manager. It helps in writing large programs, keeping track of dependencies, and sharing your code. Cargo comes installed with Rust.
We can now create a new project with cargo.
cargo new hello_cargo
cd hello_cargo
The folder hello_cargo will contain different files: the main.rs file within the source folder src and the Cargo.toml.
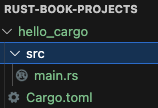
The main.rs file is the same file we manually created before. The Cargo.toml is the TOML (Tom’s Obvious Minimal Language) format, which is Cargo’s configuration format.

In there, you have the package configuration information and dependencies.
Building and Running Project with Cargo
From the hello_cargo directory, you can use the commands below to build your Rust program.
cargo build
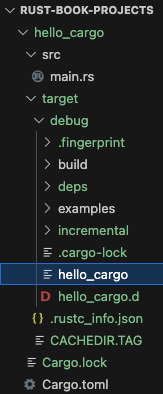
This will compile the project and create the following files:
target/debug/hello_cargoexecutable. With cargo, the default build is a debug build.Cargo.lock, keeps track of dependencies
The command does not run the executable. To run it, you need to type ./target/debug/hello_cargo in the terminal.
To compile and run the code in one step, you can use.
cargo run
If you wish to check if the code compiles correctly without producing the executable, you can run:
cargo check
The cargo check command will produce the /target folder but will not produce the hello_cargo executable.
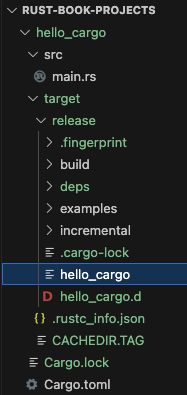
For the final code release version, you can produce a faster executable file not made for development by running
cargo build -- release
This action will create the ./target/release folder with the hello_cargo executable in it.
So far we learned the basics of Rust and Cargo. We created a simple Rust program, and we learned how to create and run Rust projects with Cargo. See you in the next post!
🔥 Web3 explained from the non-developer's POV. 🚀 Helping Polkadot users explore the ecosystem with confidence. I post daily on socials. Opinions are mine.
14 comments